Introduction
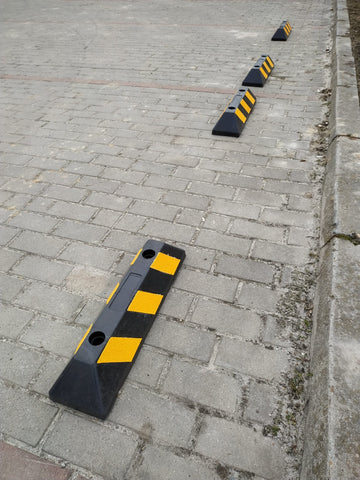
Picture this: you’re navigating a crowded parking lot, trying to find a spot without bumping into the car next to you. Sounds stressful, right? Well, it doesn't have to be. With rubber parking separators, managing and navigating parking spaces can become a breeze. These handy tools not only organize parking lots efficiently but also prevent the scrapes and bumps cars often endure in tight spaces. In this blog post, we’ll walk you through the nuts and bolts of installing rubber parking separators, catering to a variety of ground types. Whether you're outfitting a commercial lot, a residential area, or a public space, we've got you covered.
Why Rubber Parking Separators?
Our extensive range of parking separators is designed to offer durability, visibility, and versatility. Made from high-quality materials like rubber, they stand the test of time against weather and wear. Rubber, known for its resilience and stability, makes these separators an ideal choice for any setting. Plus, with their enhanced visibility—thanks to bright colors or reflective surfaces—they significantly increase safety in low-light conditions. And let's not forget, they're a breeze to install!
Choosing the Right Parking Separator
Before diving into installation, it's crucial to pick a separator that fits your needs. Consider the following:
- Material Quality: Opt for durable rubber for its long-lasting resilience.
- Visibility: Choose separators with reflective surfaces to ensure they are easily seen at night.
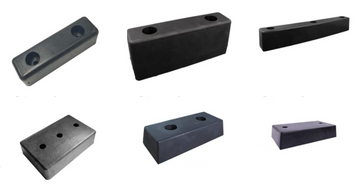
- Design: From flat to more pronounced bumpers, select a style that suits your parking layout and vehicle types.
- Application: Think about where you'll be using them—commercial lots, residential areas, or public spaces.
Installation on Different Grounds
Asphalt
- Mark the Area: Clearly mark where the separator will be placed.
- Drill Holes: Drill holes into the asphalt where the bolts will go.
- Secure the Separator: Position the separator and secure it with bolts and possibly a bit of adhesive for extra stability.
Concrete
- Positioning: Like with asphalt, start by marking the area.
- Drilling Required: Use a hammer drill to create holes for the bolts.
- Install: Place the separator and fasten it securely with bolts. Sealant can be used around the edges for additional adherence.
Gravel or Dirt
- Prepare the Base: For less stable grounds like gravel or dirt, preparing a more solid base might be necessary. Consider laying a concrete pad or compacting the area with a tamper.
- Secure in Place: Use longer stakes or rebars to anchor the separator into the ground, ensuring it stays put.
Temporary Installation
For scenarios requiring temporary placement, such as events, opt for separators designed for easy removal. These might use heavy-duty but removable adhesives or a simple interlocking system.
Maintenance and Care
Maintaining your rubber parking separators is straightforward. Regularly check for wear and tear, especially after extreme weather conditions. Cleaning them periodically with water and mild detergent will keep them looking new and ensure their reflective surfaces remain effective.
Conclusion
Rubber parking separators are a game-changer for anyone looking to improve parking efficiency and vehicle safety. With their easy installation, high visibility, and durability, they're an excellent investment for any parking area. By following the guidelines provided, you can ensure a smooth and successful installation process, regardless of the ground type. Ready to transform your parking spaces? Explore our collection of parking separators and take the first step towards a safer, more organized lot.
Fancy giving your parking lot a much-needed upgrade? Our rubber parking separators are just the ticket for a safer, more efficient space. Check out our range today and see the difference for yourself!


